Bella FSM QuickBooks Integrator is designed for these versions of QuickBooks Desktop:
- U.S. editions of QuickBooks Financial Software products
- QuickBooks Enterprise Solutions (2015 or later)
- QuickBooks Premier (2015 or later)
- QuickBooks Pro (2015 or later)
- Canadian editions of QuickBooks (2015 or later)
- UK editions of QuickBooks (2015 or later)
IMPORTANT:
- Before any integration, backup your QuickBooks company file. The integration process cannot be reversed!
- We highly recommend creating a test company or use a sample company in QuickBooks to closely test the integration.
- If you use Advanced Inventory in QuickBooks with ‘Multiple Inventory Sites’ enable, be sure you have ‘Advanced Inventory’ active in your Bella FSM account and also enable ‘Activate Multiple Inventory Sites’ in Account Settings.
- There are certain restrictions that QuickBooks places on importing data which unfortunately we cannot change. They need to be corrected or the data will not sync:
- Item Names cannot have duplicates in Bella before you sync.
- A Customer Name and Vendor Name cannot be identical in Bella before you sync.
- These are character length maximums:
- Account Name: 31
- Account Number: 7
- Class Name: 31
- Customer Name: 41
- First Name: 25
- Middle: 5
- Last Name: 25
- Address Line 1: 41
- Address Line 2: 41
- City: 31
- State / Province: 21
- Postal / Zip: 13
- Country: 31
- Invoice Number: 11
- Item Description: 4095
- Item Name: 31
- Item Part Number: 31
- Job Description: 99
- Job Name: 41
- PO Number: 25
- Vendor Name: 41
Step 1)
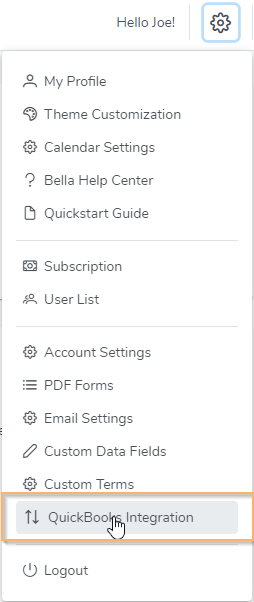
- Download the Bella FSM QuickBooks Integrator (BellaFSM.qwc file) to your Windows desktop computer. To do so, click the gear icon in the upper right corner then click ‘QuickBooks Integration’ as shown below. Then click the ‘Download BellaFSM QWC file’ button located in the Step 1 section. There is no need to open this file. Simply download to your desktop or a folder.

Step 2)
- Confirm you have the QuickBooks Web Connector (version 2.2 or higher) downloaded on your Windows desktop computer. Most likely it was installed when you installed QuickBooks.
- Open QuickBooks and go to File > Update Web Services. The QuickBooks Web Connector pop up window will open.
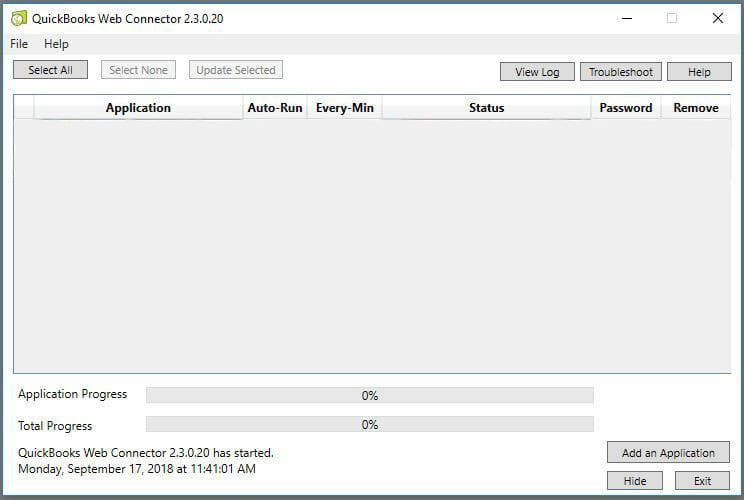
- If the QuickBooks Web Connector pop-up does not open Click Here and download any version higher than 2.2. Follow the installation instructions carefully.
- When the QuickBooks Web Connector pop-up opens, click ‘Add an Application’ in the lower right of pop-up.
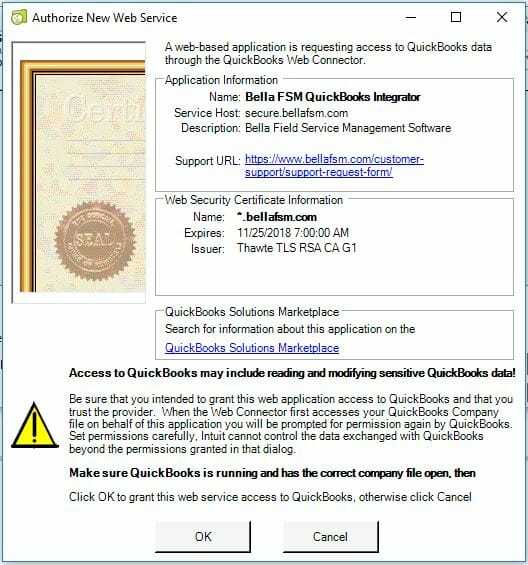
- The ‘Authorize New Web Service’ pop-up will open for Bella FSM QuickBooks Integrator. Click ‘OK’. (If this pop-up does not open, find the BellaFSM.qwc file you downloaded in Step 1 and open.)
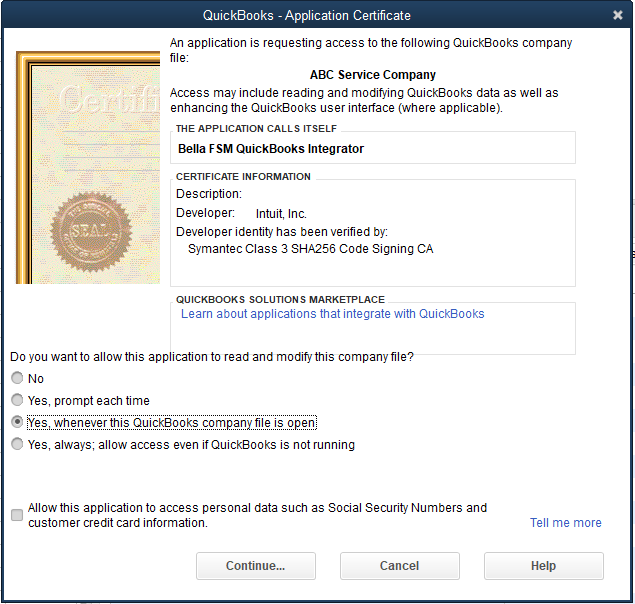
- The ‘QuickBooks – Application Certificate’ pop-up will then open. Select one of the three ‘Yes’ options and click Continue.
- The ‘Access Confirmation’ pop-up will then open. Click ‘Done’.
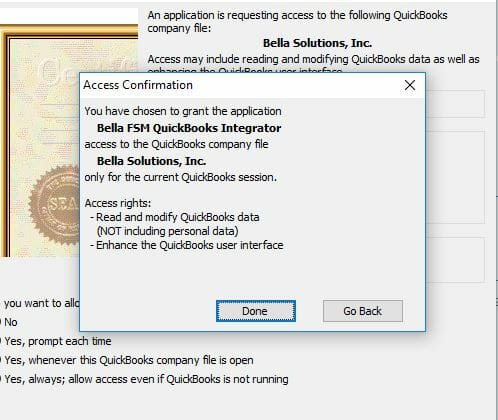
- The Bella FSM QuickBooks Integrator is now listed in your QuickBooks Web Connector.
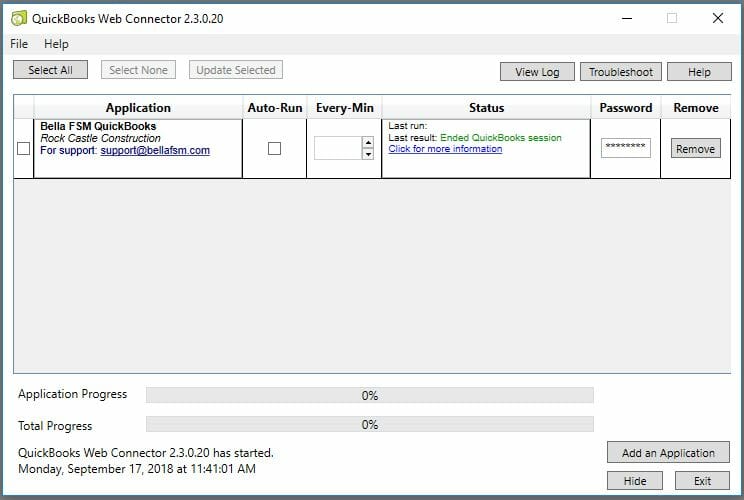
- Enter your Bella FSM password in the ‘Password’ box. It must be the password associated with the Bella FSM Admin username that downloaded the Bella FSM QuickBooks .qwc file downloaded in Step 1.
- The Auto-Run is automatically checked and Every-Min is set to 1440. You can increase this number or uncheck Auto-Run, however do not decrease the Every-Min number.
- Make sure you have Bella open and close all windows in QuickBooks before syncing.
- To manually sync, check the box to the left of ‘Bella FSM QuickBooks Integrator’ and then click ‘Update Selected’.
