Customers
Customers can be added individually or by importing a list. There is no limit to the number of customers in your account.
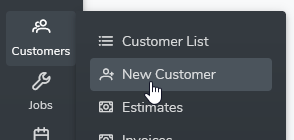
- To create a new customer click the left side menu ‘New Customer’ under Customers
- To import a customer list, click the gear icon in the upper right corner then select ‘Data Import’
- If you have QuickBooks Integration activated in your account, import your customers from QuickBooks by syncing. Click the gear icon then ‘QuickBooks’
Jobs
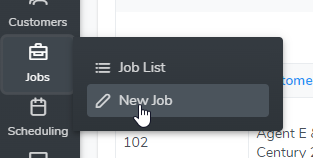
Bella FSM is centered around jobs. Add a job by clicking the left side menu ‘New Job’ under Jobs.
- All work orders, invoices and estimates (quotes) are created from a job.
- For example, to create an estimate for a customer, create a new job and set the Job Status to ‘Estimate’ (or any Job Status you prefer for tracking).
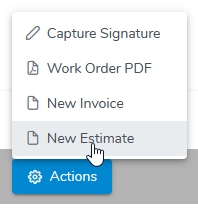
- Click the blue ‘Actions’ button at the bottom of the job page and select ‘New Estimate’.
- If the customer accepts the estimate, edit the job and update the job status to ‘Work Order’. Assign the job to a field resource and schedule it.
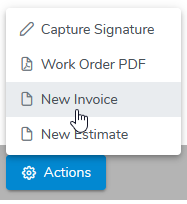
- When the work is complete and you want to create an invoice, edit the job and click the blue ‘Actions’ button at the bottom of the job page and select ‘New Invoice’. Update the job status to ‘Invoiced’ (or any Job Status you prefer).
You can create multiple estimates and invoices for each customer job. The estimate and invoice pull the information from the job page including the items (products and services provided).
Items
Items are your products and services. These are similar to items in QuickBooks and other accounting software.
- Several default items were created with your account
- View your Item List by clicking the left side menu ‘Item List’ under Accounting
- You can edit these items and add new items, or import an item list by clicking the gear icon and selecting ‘Data Import’
- If you have QuickBooks Integration activated in your account, import your items from QuickBooks by syncing. Click the gear icon then ‘QuickBooks’
- You will be able to add Items to job work orders, invoices, and estimates
- learn more about items…
Field Resources
‘Field Resource’ is the term used for an employee or vendor you want to assign jobs.
- Example field resources are technicians, subcontractors, sales reps, and you!
- When creating a job, you will be able to assign one or more field resources.
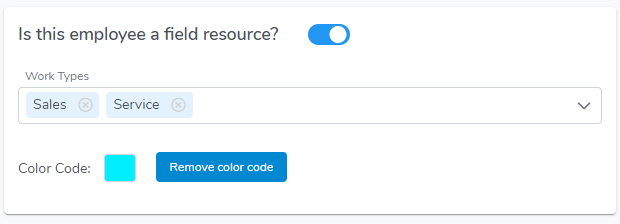
- When you create an employee or vendor you will see an option to set as a field resource:
Employees
Add an employee by clicking the left side menu ‘New Employee’ under Employees.
- If the employee is a field resource to be assigned jobs, select that option as shown above (optional).
- Assign a color code which will be the background color of job visit in the calendar (optional).

Vendors
Vendors, e.g., subcontractors can be added individually or by importing a list. There is no limit to the number of vendors in your account.
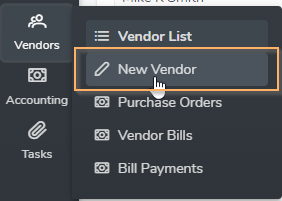
- To create a vendor click the left side menu ‘New Vendor’ under Vendors.
- To import a vendor list, click the gear icon in the upper right corner then select ‘Data Import’
- If you have QuickBooks Integration activated in your account, import your vendors from QuickBooks by syncing. Click the gear icon then ‘QuickBooks’
Company Profile (optional)
Add your company profile to display on Work Order, Invoice, and Estimate PDF forms.
- Click the gear icon in the upper right corner then select ‘PDF Forms’
- Click ‘Company Profile for PDF forms’ and enter the information you would like to display.
- Each PDF form template can be modified by clicking on the form in the list.
Multiple Users (optional)
If you have multiple Users in your Bella FSM account, assign an employee or vendor to each username.
- Click the gear icon in the upper right corner then select ‘User List’. Click on the username to edit and assign an employee or vendor and set the username password.
- Provide the employee or vendor with the username and password. They will be able to update their username and password by clicking the gear icon in the upper right corner and selecting ‘My Profile’
Mobile Access (optional)
You have two options to access Bella FSM on mobile devices:
- Login to Bella FSM with your mobile browser using the same URL as you use from your computer or laptop, secure.bellafsm.com. The software will detect a mobile device and adjust to fit to the screen.
- The benefit is, you have full software functionality.
- The drawback is, you must have internet access.
- Download Bella FSM Mobile app to your mobile device on Google Play or the App Store
- The benefit is, if you lose internet access you can still use the app and it will sync when internet access is restored.
- The drawback is, you will not have full software functionality using the app (same with all apps)
System Settings (optional)
All system settings for your account can be found by clicking the gear icon in the upper right corner. An admin user will have access to all settings. Standard users will have limited access.
We recommended at least review Account Settings
Theme Customization (optional)
Easily customize the menu layout and colors by clicking the gear icon in the upper right corner then selecting ‘Theme Customization’
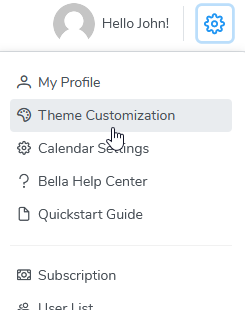
When the theme option menu opens, you can select the menu layout, light or dark scheme, colors, etc…
That’s it! You are ready to Streamline Your Business!
