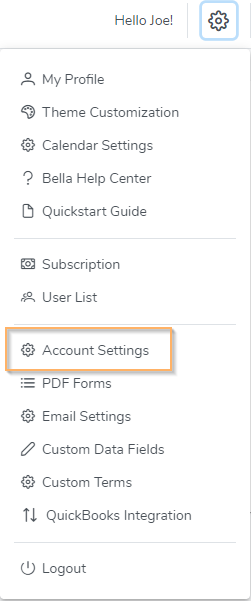
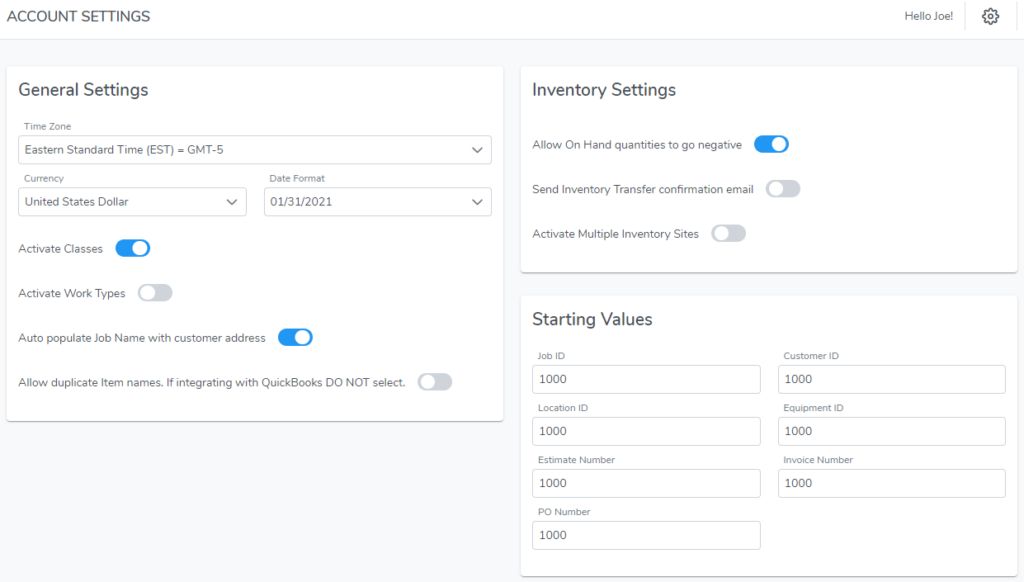
Your account has several settings. Default settings where applied when your account was created. These settings are global and apply to all Users. To view or modify the account settings click on the gear icon in the upper right corner then select Account Settings:


General Settings
- Time Zone: Setting your time zone is not required. However it will place the correct time stamp on reports and notes entered in the system. Also, if you have multiple users in your account who are located in different time zones, set the appropriate time zone in their Employee or Vendor profile.
- Currency: Currency format to display in the software, reports and PDF’s.
- Date Format: Date format to display in the software, reports and PDF’s.
- Classes: If you use the Class feature in QuickBooks and plan to integrate with QuickBooks select this option. Create your list of Classes by clicking the gear icon in the upper right corner then selecting ‘Custom Terms’, then ‘Class’.
- Work Types: Activate the Work Type feature. Think of Work Types as skill sets or certifications. If activated, create your list of Work Types by clicking the gear icon in the upper right corner then selecting ‘Work Types’. You can assign Work Types to Field Resources (Employees and Vendors) and Items. You have the option to assign Work Types to a job. The Field Resource dropdown will only display Field Resources which are assigned those Work Types. Also, the Job Item list will only display Items with those assigned Work Types.
- Job Name Auto Populate: Auto-populates the Job Name with the customer address when creating a new job. This feature is helpful for businesses who wish to track jobs by address.
- Allow Duplicate Item Names: Allows entering Items with duplicate names. Do not activate this feature if you plan to integrate with QuickBooks. QuickBooks does not allow duplicate Item names and sync errors will occur.
Inventory Settings
- Allow On Hand quantities to go negative: Allows you to add inventory to a job, estimate, or work order even though there is not enough on hand.
- Multiple Inventory Sites: Track inventory located across multiple sites. The Inventory List will include a ‘Site’ filter and you’ll have the ability to transfer inventory from site to site. Also, if you integrate with QuickBooks and you use Advanced Inventory and ‘Multiple Inventory Sites’ is enable in QuickBooks, this feature must be activated.
- Send Inventory Transfer Confirmation Email: Requires the receiving inventory site to confirm they received the inventory and therefore now responsible for it.
Starting Values
Starting Values will be used as the first auto-populated ID when creating a a new job, customer, invoice, etc… For example, if you set the Job ID starting value to 1000, the first job you created will have a Job ID of 1000.
