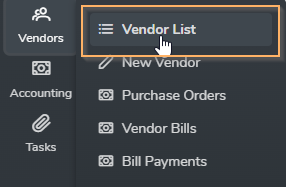
The Vendor tab manages all of your vendors. Vendors may be assigned a username and given limited access set by an admin user. Vendors may also be marked as a “Field Resource” available for scheduling. Set up subcontractors as vendors and track their hours worked and view outstanding balances.
Add a new Vendor by clicking the left side “Add Vendor” or the “Add a new Vendor” button at the top of the data table. Enter the Vendor data and click “Save”. The “Vendor Name” is the only required data to create a new Vendor.
Vendor Type can be assigned to each vendor. Several Vendor Types were created with your account which may be edited. Tax Agency cannot be modified. Additional Vendor Types may be added by clicking the “Add New” button at the top of the Vendor Type list. Click on the Vendor Type name to edit.
Field Resource is a setting to indicate if this vendor is available to be assigned to jobs. If the Field Resource setting is set to “Yes” then this vendor will display in the Field Resource picklist on the job page.
Work Types can be assigned to a vendor if the Field Resource setting is “Yes”. Think of Work Types as a skill set. If a Work Type is selected in the Appointment Details section of a job, then the Field Resource picklist filters to only display Field Resources assigned to that Work Type. Custom Work Types can be created in the Admin tab.
Email Alerts – enter email address for this vendor to receive email alerts when assigned to a job. The email will only be sent if you chose to do so on the job page.
Text Alerts – enter mobile device text address for this Vendor to receive text alerts. Click on the Wireless Providers link to view text address formats.
Financial Details – Bella FSM will track all transactions for each vendor and keep a running balance. Entering a credit limit will cause the balance to turn red if the Vendor is over the limit. Click the “Vendor Transaction” left side menu to view all transactions for the Vendor.
Editing a Vendor by clicking the Vendor Name in the Vendor list.
Vendor Color Code may be assigned if the Field Resource setting is set to “Yes”. Click inside the color code box to open the color palette. Click on the desired color. When you save the vendor the color code will also save. The color will display as the background on the calendar for jobs assigned to this vendor when the “Color Code View” in the Scheduling tab is set to Field Resource.
For more details please see Creating and Editing a Vendor